


How to use a touch-up pen
The PaintNuts touch-up paint pen is ideal for addressing minor scratches and small chips. Below is our recommended guide for using and applying touch-up paint effectively.
If you have a deep scratch or chip OR if you can see bare metal or plastic, we recommend using PaintNuts Primer first - if rust is present, we suggest our Rust Convertor as well.
Not sure if touch-up paint pen is right for the job? You can carry out a damage assesment using our tool.
Prepare & Clean
To ensure that your touch-up paint application is effective and delivers the best results, it's vital to begin with a clean and dry surface. This means removing any substances that could impede paint adhesion.
1. Removing Wax and Polish: If you've recently waxed or polished your vehicle, these coatings need to be eliminated. Wax and polish can create a barrier that hinders the paint from adhering properly. You should use a suitable wax or polish remover and carefully follow the product's instructions to ensure complete removal.
2. Clearing Away Grease: Any greasy or oily residues on the surface should also be thoroughly removed, as they can interfere with the bonding of the paint. A degreasing cloth or a dedicated degreasing product can be employed to effectively eliminate these greasy spots.
3. Using PaintNuts Panel Wipe Spray: For optimal results, it is recommended to employ PaintNuts Panel Wipe Spray. This product is specially designed to clean and prepare the surface for painting. Apply the panel wipe spray to a clean cloth and then wipe down the area where you intend to apply the touch-up paint. This step ensures that the surface is impeccably clean and ready to receive the paint.
Shake & Test
Shaking the Paint Pen is a crucial step in the process. The paint inside the pen may have settled or separated over time especially If your paint is metallic or pearlescent, thorough mixing is essential to achieve the right consistency and color uniformity. Here's why this step is important:
-
Even Dispersion: Shaking the pen for an extended period ensures that any pigments or components in the paint are evenly dispersed. This means that the color and texture of the paint will be consistent, preventing any unevenness or streaks in the final application.
-
Achieving the Right Color: Some paints, especially metallic or pearlescent ones, can settle or separate, making the color look uneven. Shaking the pen helps blend these components, ensuring that the color matches the original finish of your vehicle.
-
Proper Adhesion: Properly mixed paint adheres better to the surface and provides better coverage. It reduces the risk of blotchy or uneven application, which can be challenging to fix once the paint has dried.
-
Overall Finish: The final finish of your touch-up job depends on how well the paint is mixed. A well-mixed paint ensures a smoother, more consistent result, making the repair less noticeable
Brush or Nib?
When deciding which applicator to use, please just consider the size and type of the area you're fixing.
The needle-like pen is perfect for precise, small-scale work, while the brush is suitable for slightly larger or more generalised touch-up areas.
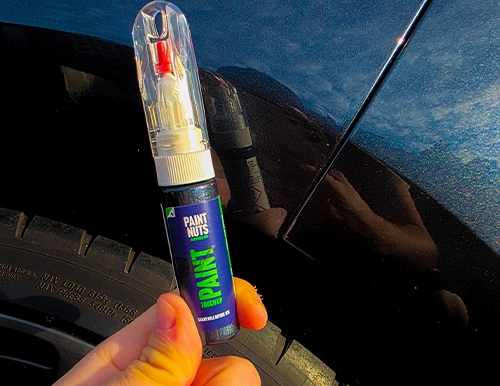
The 20 ml touch-up paint comes with a high precision needle-like pen that is concealed inside the clear lid. This pen is designed for pinpoint accuracy when applying paint to scratches or small chips. Here's how to access and use it:
- Start by locating the clear lid on the touch-up paint container.
- Inside this lid, there's a red protective tip that remains securely inside it to prevent any accidental spills or leaks.
- To access the high-precision needle-like pen, you need to perform a firm pull on the lid. Gently tug it in an upward direction, and the pen should become visible. Make sure to handle this pen with care, as it's designed for precise applications.
In addition to the needle-like pen, the 20 ml touch-up paint also features a small, fine brush that's embedded within the paint itself. This brush is useful for broader strokes or areas that require a bit more coverage. Here's how to access and use it:
- On the main container of the touch-up paint, there is a white collar around the neck.
- The small fine brush is situated inside the paint, right beneath this white collar.
- To access the brush, you should unscrew the white collar in an anticlockwise (counterclockwise) direction. This action will reveal the brush.
Test a small amount of paint within the damaged area to check the colour match – give it 15 minutes to dry as paints can often appear different in colour; inside the bottle, when still wet or if applied incorrectly or onto original undamaged paint work.

Paint & Finish
With either pen or brush apply thin, light coats in smooth strokes; ensuring you only apply the paint within the damaged area.
If you’re using the needle point pen allow the nib to sit inside the scratch or chip and squeeze gently.
f new paint goes outside of the damaged area and on top of existing paint it will leave the area of repair looking darker or a higher level to the original bodywork.
Leave the paint to dry for 15 minutes before applying any further coats, if no further coat is required, then leave to cure for 1 hour before applying the PaintNuts Clear Lacquer.
PLEASE NOTE: – cold, damp weather can adversely affect the application, finish, and drying time of paints